LED Strip kurze Vorstellung
Februar 12, 2023 - Lesezeit: 8 Minuten
Die Beleuchtung für meine Bar mit einem LED Strip ist fertig gestellt.
Stückliste:
- LED Strip WS2812B mit 25 RGB LEDs
- Arduino Nano
- USB Steckernetzteil mind. 5 V / 1 A, qualitativ hochwertig
- Gehäuse für den Arduino (3D-Druck)
- Kunststoffhalter für den Anschluß der Kabel an den Strip
Der Strip kann selbstverständlich auch mehr als 25 LEDs besitzen, die Anzahl muß dann im Arduino Code angepasst werden. Dazu später mehr.
Ich wollte eigentlich zur Steuerung einen ATtiny85 verwenden, allerdings hätte ich den erst programmieren, dann auf einer Platine die Schaltung zusammenlöten müssen usw. Aus diesen Gründen habe ich mich für einen Arduino Nano entschieden. Ein weiterer Vorteil besteht darin, dass ich jederzeit den Code und damit den Ablauf des Farbspiel ändern kann.
Das Ganze sollte mit nur einem Anschlußkabel USB und passendem USB Steckernetzteil betrieben werden. Bei dem USB Steckernetzteil auf eine gute Qualität chten, d.h. es sollte saubere 5 Volt liefern und für mind. 1 Ampere ausgelegt sein. Ich verwende hier ein altes iPhone USB Steckernetzteil.
Der Strip benötigt in meiner Konfiguration ca. 220 mA, d.h. auch mit einer USB Powerbank mit z.B. 1000 mAh, kann die Beleuchtung gute 4 Stunden betrieben werden. Nur für den Fall, das keine Steckdose in der Nähe ist.
Ganz wichtig an dieser Stelle ist, die 5 Volt für den LED Strip müssen am Eingang des Arduino Nano abgegriffen werden. Deshalb ist auch ein gutes Netzteil wichtig, bei dem die 5 Volt nicht gleich unter Last zusammenbrechen. Die Verkabelung vom Arduino zu dem Strip sollte möglichst kurz sein.
Für die Verbindung des Strip werden 3 Leitungen benötig. 5 Volt, GND und Data IN (Pin 6 am Arduino)
Auf keinen Fall die 5 Volt von einem Ausgang des Arduino abgreifen, da dieser nur ca. 20 bis 40 mA liefern kann. Ich habe die 5 Volt, wie bereits beschrieben, direkt an der Eingangs USB Buchse des Arduino abgegriffen.
Aufbau:
Der Ardunio Nano im Gehäuse aus dem 3D Drucker
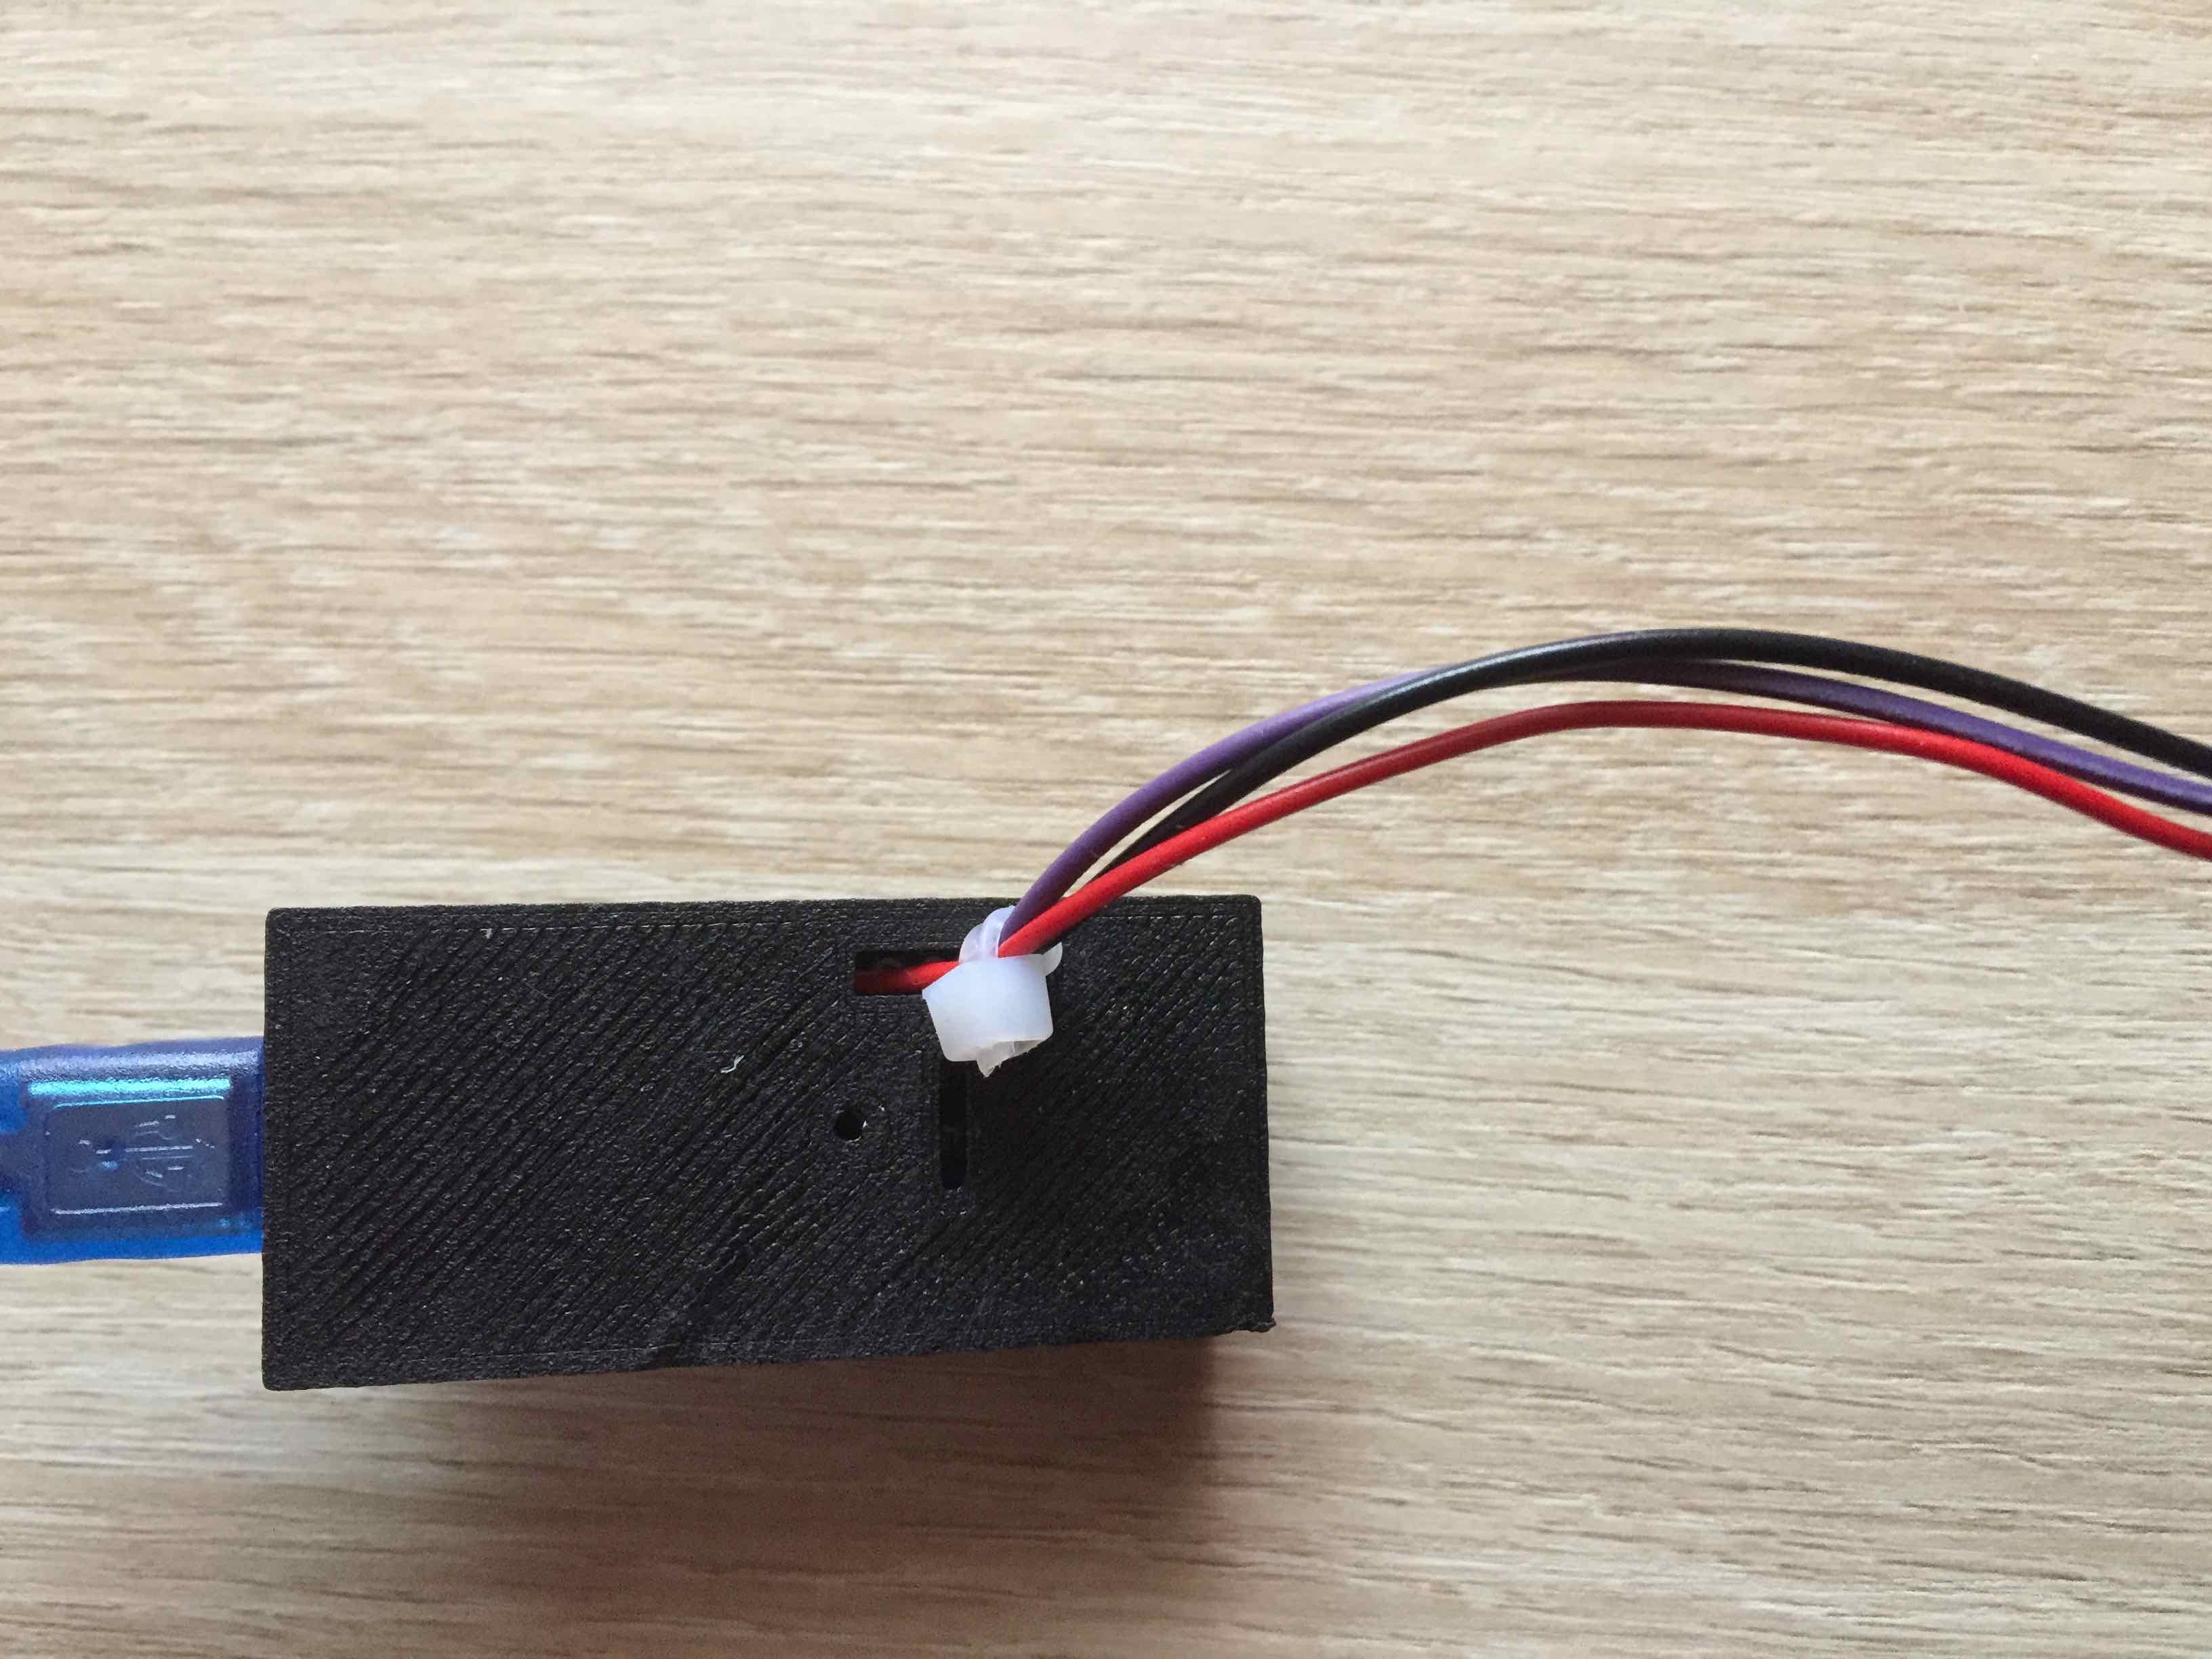
Anschluß des Stripe in dem Kunststoffhalter

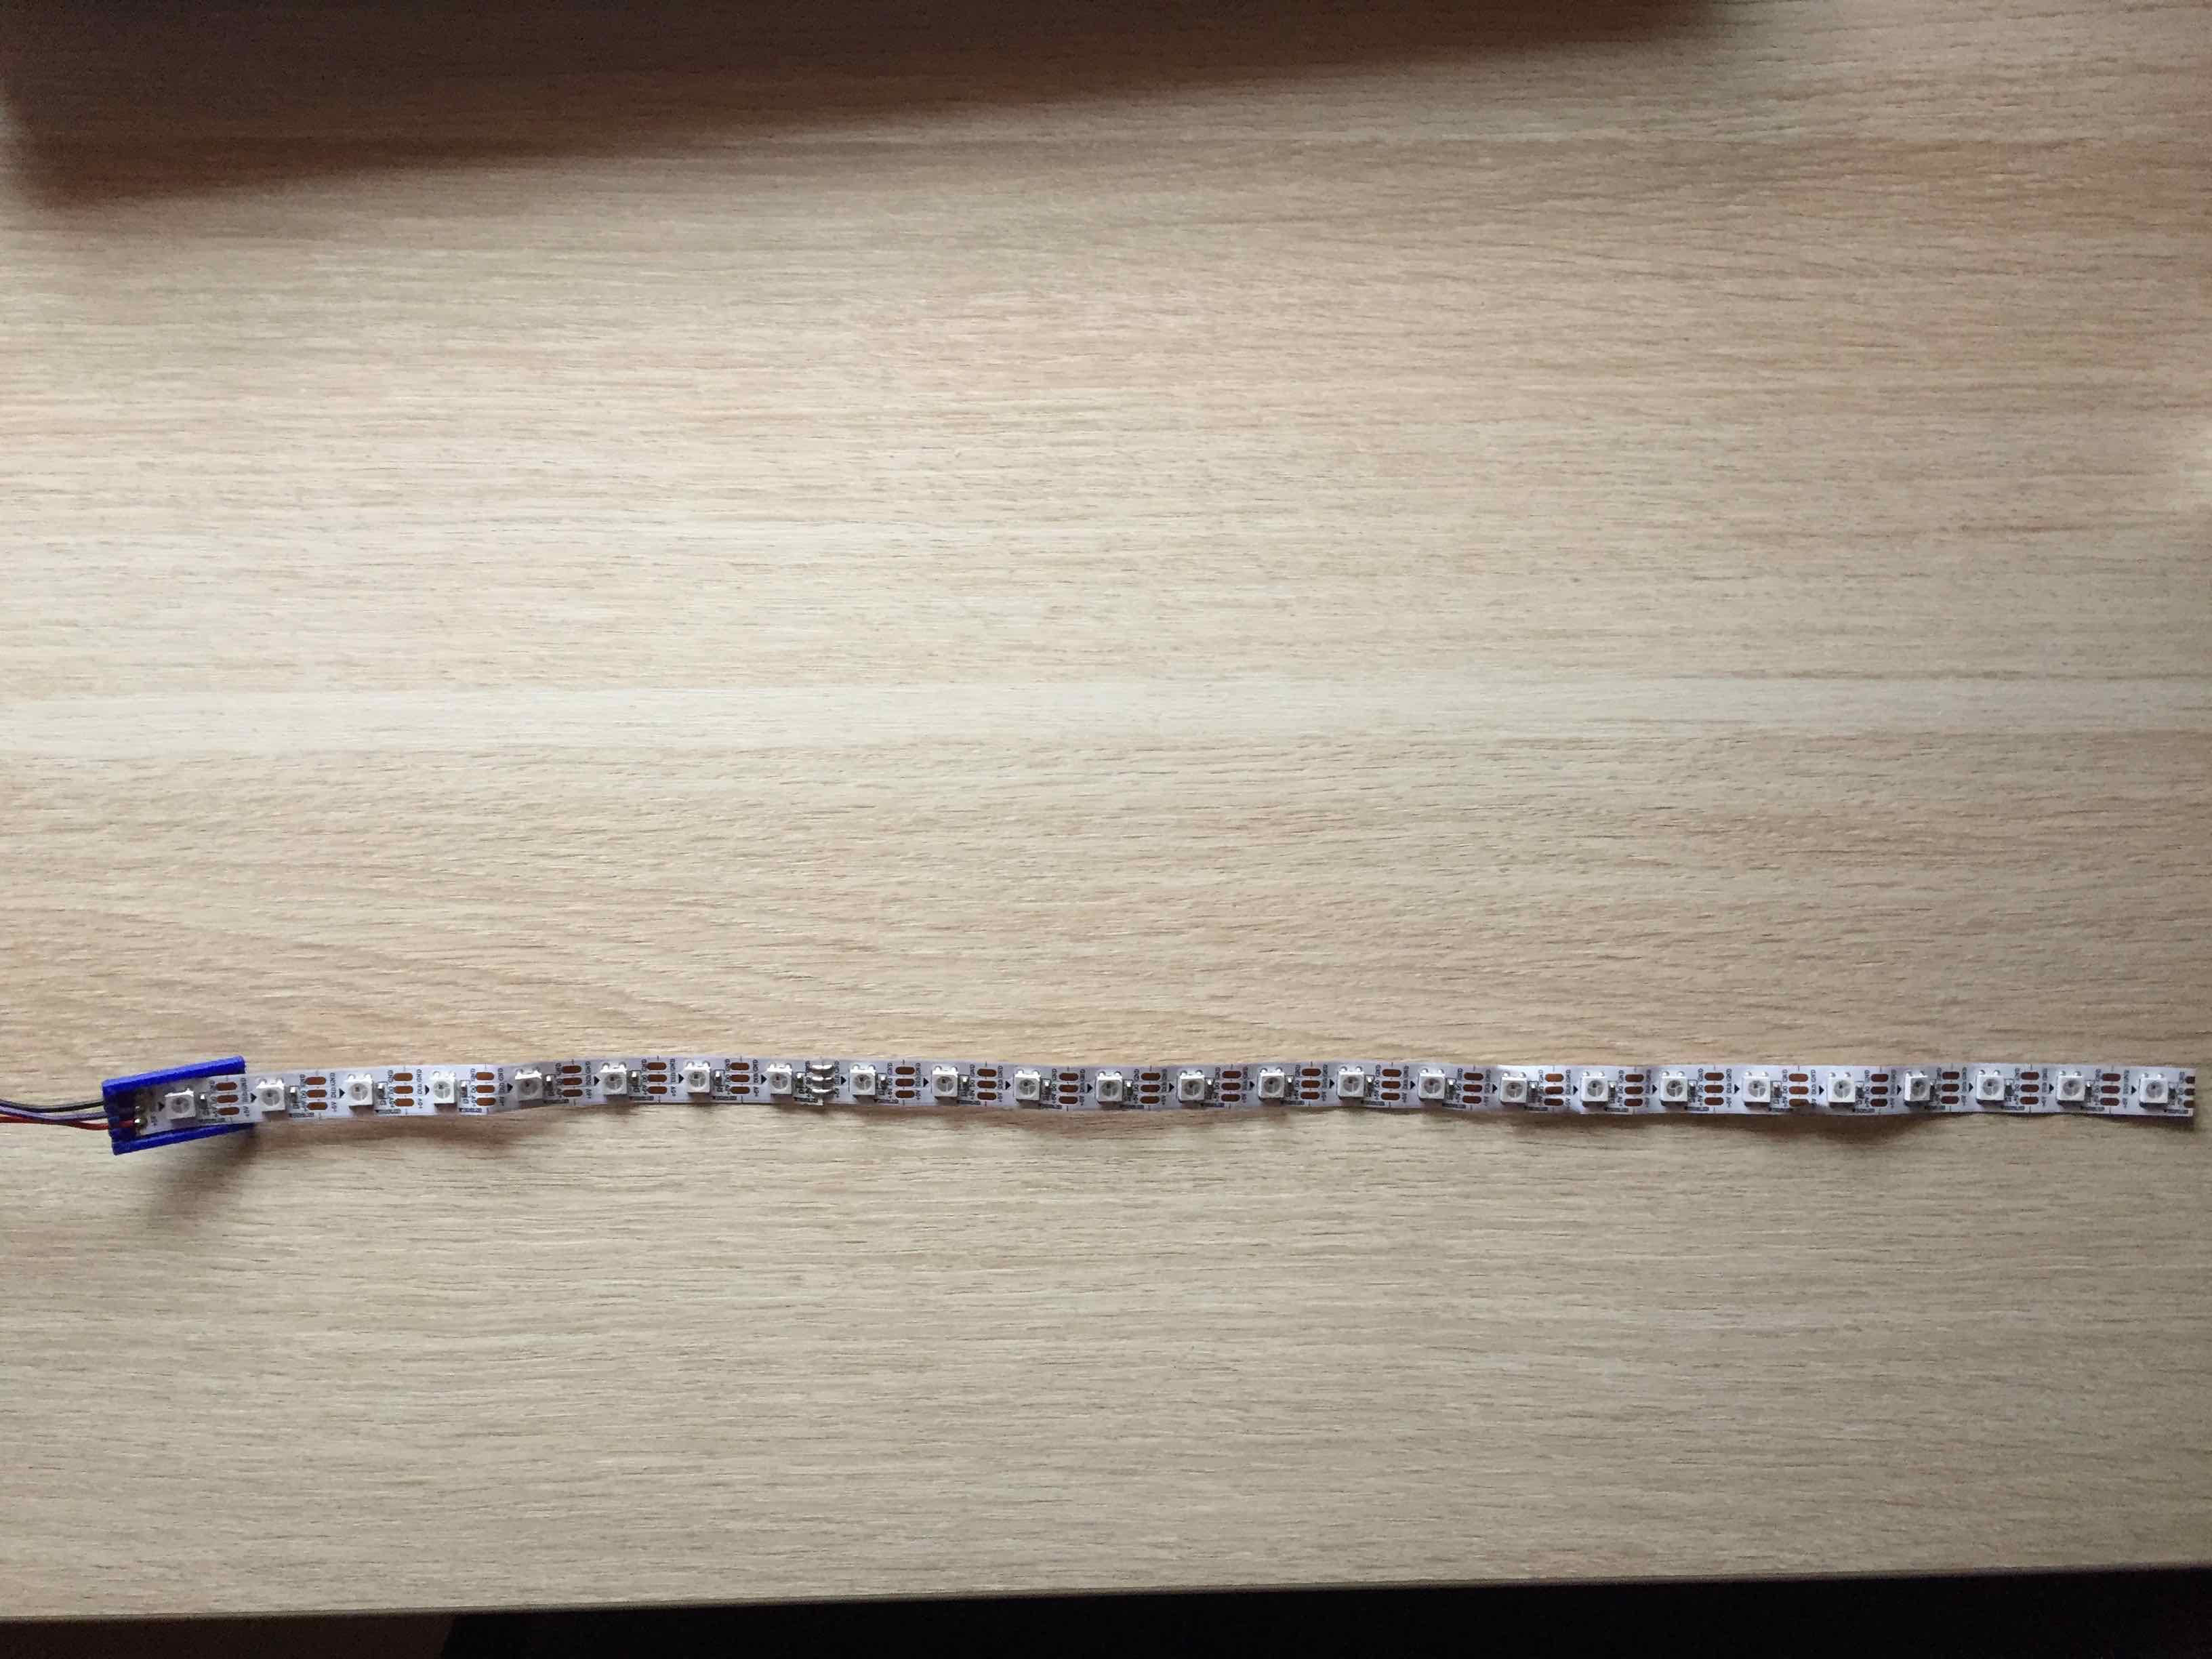
Der Ganze Strip mit 25 LEDs, der noch an der Bar angebracht werden muß
Ich habe als Grundlage für den Code das Beispiel aus der Arduino IDE verwendet und für meine Bedürfnisse angepasst.
Diese Zeilen müssen ggf. geändert werden.
// Which pin on the Arduino is connected to the NeoPixels?
// On a Trinket or Gemma we suggest changing this to 1:
#define LED_PIN 6
// How many NeoPixels are attached to the Arduino?
#define LED_COUNT 25
Der Code:
// Program for LED Strip
// For LED WS2812B Strip
// Modified from original Arduino strandtest
// © 22.01.2023 by Thomas Weidner
// tweidner@mac.com
// From original source code
// A basic everyday NeoPixel strip test program.
// NEOPIXEL BEST PRACTICES for most reliable operation:
// - Add 1000 uF CAPACITOR between NeoPixel strip's + and - connections.
// - MINIMIZE WIRING LENGTH between microcontroller board and first pixel.
// - NeoPixel strip's DATA-IN should pass through a 300-500 OHM RESISTOR.
// - AVOID connecting NeoPixels on a LIVE CIRCUIT. If you must, ALWAYS
// connect GROUND (-) first, then +, then data.
// - When using a 3.3V microcontroller with a 5V-powered NeoPixel strip,
// a LOGIC-LEVEL CONVERTER on the data line is STRONGLY RECOMMENDED.
// (Skipping these may work OK on your workbench but can fail in the field)
#include <Adafruit_NeoPixel.h>
#ifdef __AVR__
#include <avr/power.h> // Required for 16 MHz Adafruit Trinket
#endif
// Which pin on the Arduino is connected to the NeoPixels?
// On a Trinket or Gemma we suggest changing this to 1:
#define LED_PIN 6
// How many NeoPixels are attached to the Arduino?
#define LED_COUNT 25
// Declare our NeoPixel strip object:
Adafruit_NeoPixel strip(LED_COUNT, LED_PIN, NEO_GRB + NEO_KHZ800);
// Argument 1 = Number of pixels in NeoPixel strip
// Argument 2 = Arduino pin number (most are valid)
// Argument 3 = Pixel type flags, add together as needed:
// NEO_KHZ800 800 KHz bitstream (most NeoPixel products w/WS2812 LEDs)
// NEO_KHZ400 400 KHz (classic 'v1' (not v2) FLORA pixels, WS2811 drivers)
// NEO_GRB Pixels are wired for GRB bitstream (most NeoPixel products)
// NEO_RGB Pixels are wired for RGB bitstream (v1 FLORA pixels, not v2)
// NEO_RGBW Pixels are wired for RGBW bitstream (NeoPixel RGBW products)
// setup() function -- runs once at startup --------------------------------
void setup() {
// These lines are specifically to support the Adafruit Trinket 5V 16 MHz.
// Any other board, you can remove this part (but no harm leaving it):
#if defined(__AVR_ATtiny85__) && (F_CPU == 16000000)
clock_prescale_set(clock_div_1);
#endif
// END of Trinket-specific code.
strip.begin(); // INITIALIZE NeoPixel strip object (REQUIRED)
strip.show(); // Turn OFF all pixels ASAP
strip.setBrightness(100); // Set BRIGHTNESS to about 1/5 (max = 255)
}
// loop() function -- runs repeatedly as long as board is on ---------------
void loop() {
// Fill along the length of the strip in various colors...
colorWipe(strip.Color(255, 0, 0), 150); // Red Delay
colorWipe(strip.Color( 0, 255, 0), 150); // Green Delay
colorWipe(strip.Color( 0, 0, 255), 150); // Blue
colorWipe(strip.Color( 255, 255, 255), 150); // White
colorWipe(strip.Color( 255, 114, 86), 150); // Orange
rainbow(50); // Flowing rainbow cycle along the whole strip
}
// Some functions of our own for creating animated effects -----------------
// Fill strip pixels one after another with a color. Strip is NOT cleared
// first; anything there will be covered pixel by pixel. Pass in color
// (as a single 'packed' 32-bit value, which you can get by calling
// strip.Color(red, green, blue) as shown in the loop() function above),
// and a delay time (in milliseconds) between pixels.
void colorWipe(uint32_t color, int wait) {
for(int i=0; i<strip.numPixels(); i++) { // For each pixel in strip...
strip.setPixelColor(i, color); // Set pixel's color (in RAM)
strip.show(); // Update strip to match
delay(wait); // Pause for a moment
}
}
// Rainbow cycle along whole strip. Pass delay time (in ms) between frames.
void rainbow(int wait) {
// Hue of first pixel runs 5 complete loops through the color wheel.
// Color wheel has a range of 65536 but it's OK if we roll over, so
// just count from 0 to 5*65536. Adding 256 to firstPixelHue each time
// means we'll make 5*65536/256 = 1280 passes through this loop:
for(long firstPixelHue = 0; firstPixelHue < 5*65536; firstPixelHue += 256) {
// strip.rainbow() can take a single argument (first pixel hue) or
// optionally a few extras: number of rainbow repetitions (default 1),
// saturation and value (brightness) (both 0-255, similar to the
// ColorHSV() function, default 255), and a true/false flag for whether
// to apply gamma correction to provide 'truer' colors (default true).
strip.rainbow(firstPixelHue);
// Above line is equivalent to:
// strip.rainbow(firstPixelHue, 1, 255, 255, true);
strip.show(); // Update strip with new contents
delay(wait); // Pause for a moment
}
}