LED Strip kurze Vorstellung
Februar 12, 2023 Lesezeit: 8 Minuten
Die Beleuchtung für meine Bar mit einem LED Strip ist fertig gestellt.
Stückliste:
- LED Strip WS2812B mit 25 RGB LEDs
- Arduino Nano
- USB Steckernetzteil mind. 5 V / 1 A, qualitativ hochwertig
- Gehäuse für den Arduino (3D-Druck)
- Kunststoffhalter für den Anschluß der Kabel an den Strip
Der Strip kann selbstverständlich auch mehr als 25 LEDs besitzen, die Anzahl muß dann im Arduino Code angepasst werden. Dazu später mehr.
Ich wollte eigentlich zur Steuerung einen ATtiny85 verwenden, allerdings hätte ich den erst programmieren, dann auf einer Platine die Schaltung zusammenlöten müssen usw. Aus diesen Gründen habe ich mich für einen Arduino Nano entschieden. Ein weiterer Vorteil besteht darin, dass ich jederzeit den Code und damit den Ablauf des Farbspiel ändern kann.
Das Ganze sollte mit nur einem Anschlußkabel USB und passendem USB Steckernetzteil betrieben werden. Bei dem USB Steckernetzteil auf eine gute Qualität chten, d.h. es sollte saubere 5 Volt liefern und für mind. 1 Ampere ausgelegt sein. Ich verwende hier ein altes iPhone USB Steckernetzteil.
Der Strip benötigt in meiner Konfiguration ca. 220 mA, d.h. auch mit einer USB Powerbank mit z.B. 1000 mAh, kann die Beleuchtung gute 4 Stunden betrieben werden. Nur für den Fall, das keine Steckdose in der Nähe ist.
Ganz wichtig an dieser Stelle ist, die 5 Volt für den LED Strip müssen am Eingang des Arduino Nano abgegriffen werden. Deshalb ist auch ein gutes Netzteil wichtig, bei dem die 5 Volt nicht gleich unter Last zusammenbrechen. Die Verkabelung vom Arduino zu dem Strip sollte möglichst kurz sein.
Für die Verbindung des Strip werden 3 Leitungen benötig. 5 Volt, GND und Data IN (Pin 6 am Arduino)
Auf keinen Fall die 5 Volt von einem Ausgang des Arduino abgreifen, da dieser nur ca. 20 bis 40 mA liefern kann. Ich habe die 5 Volt, wie bereits beschrieben, direkt an der Eingangs USB Buchse des Arduino abgegriffen.
Aufbau:
Der Ardunio Nano im Gehäuse aus dem 3D Drucker
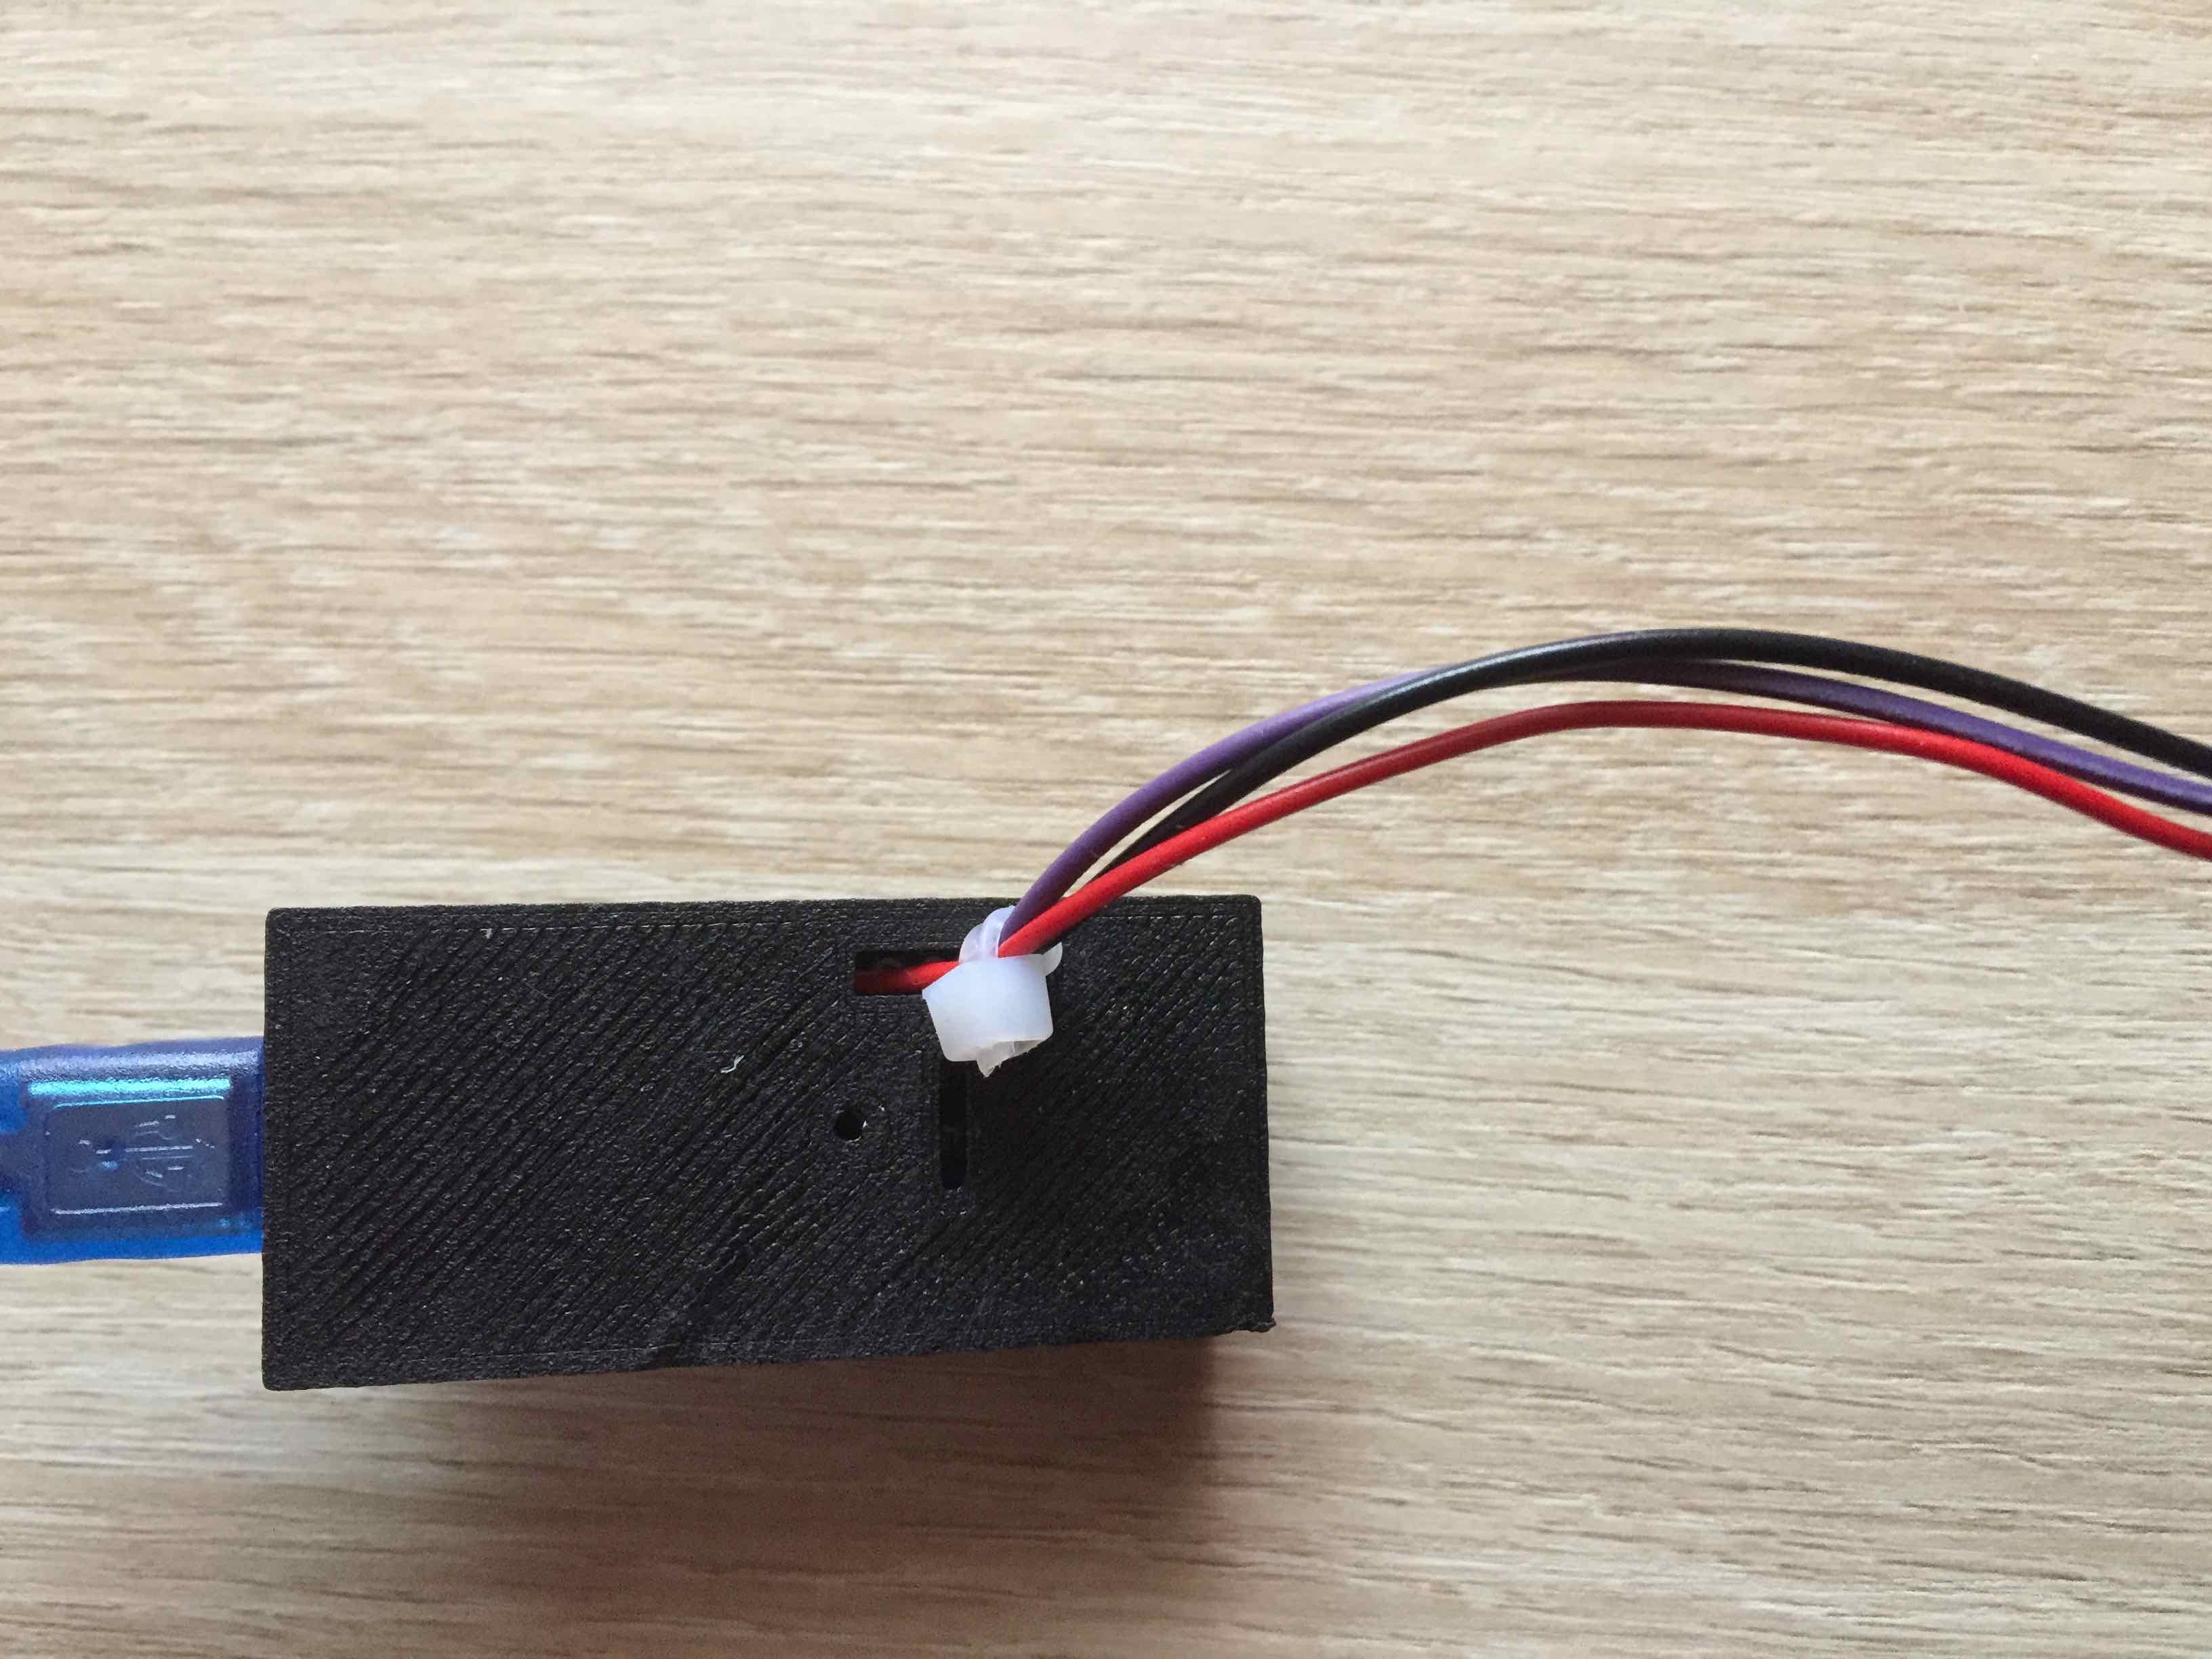
Anschluß des Stripe in dem Kunststoffhalter

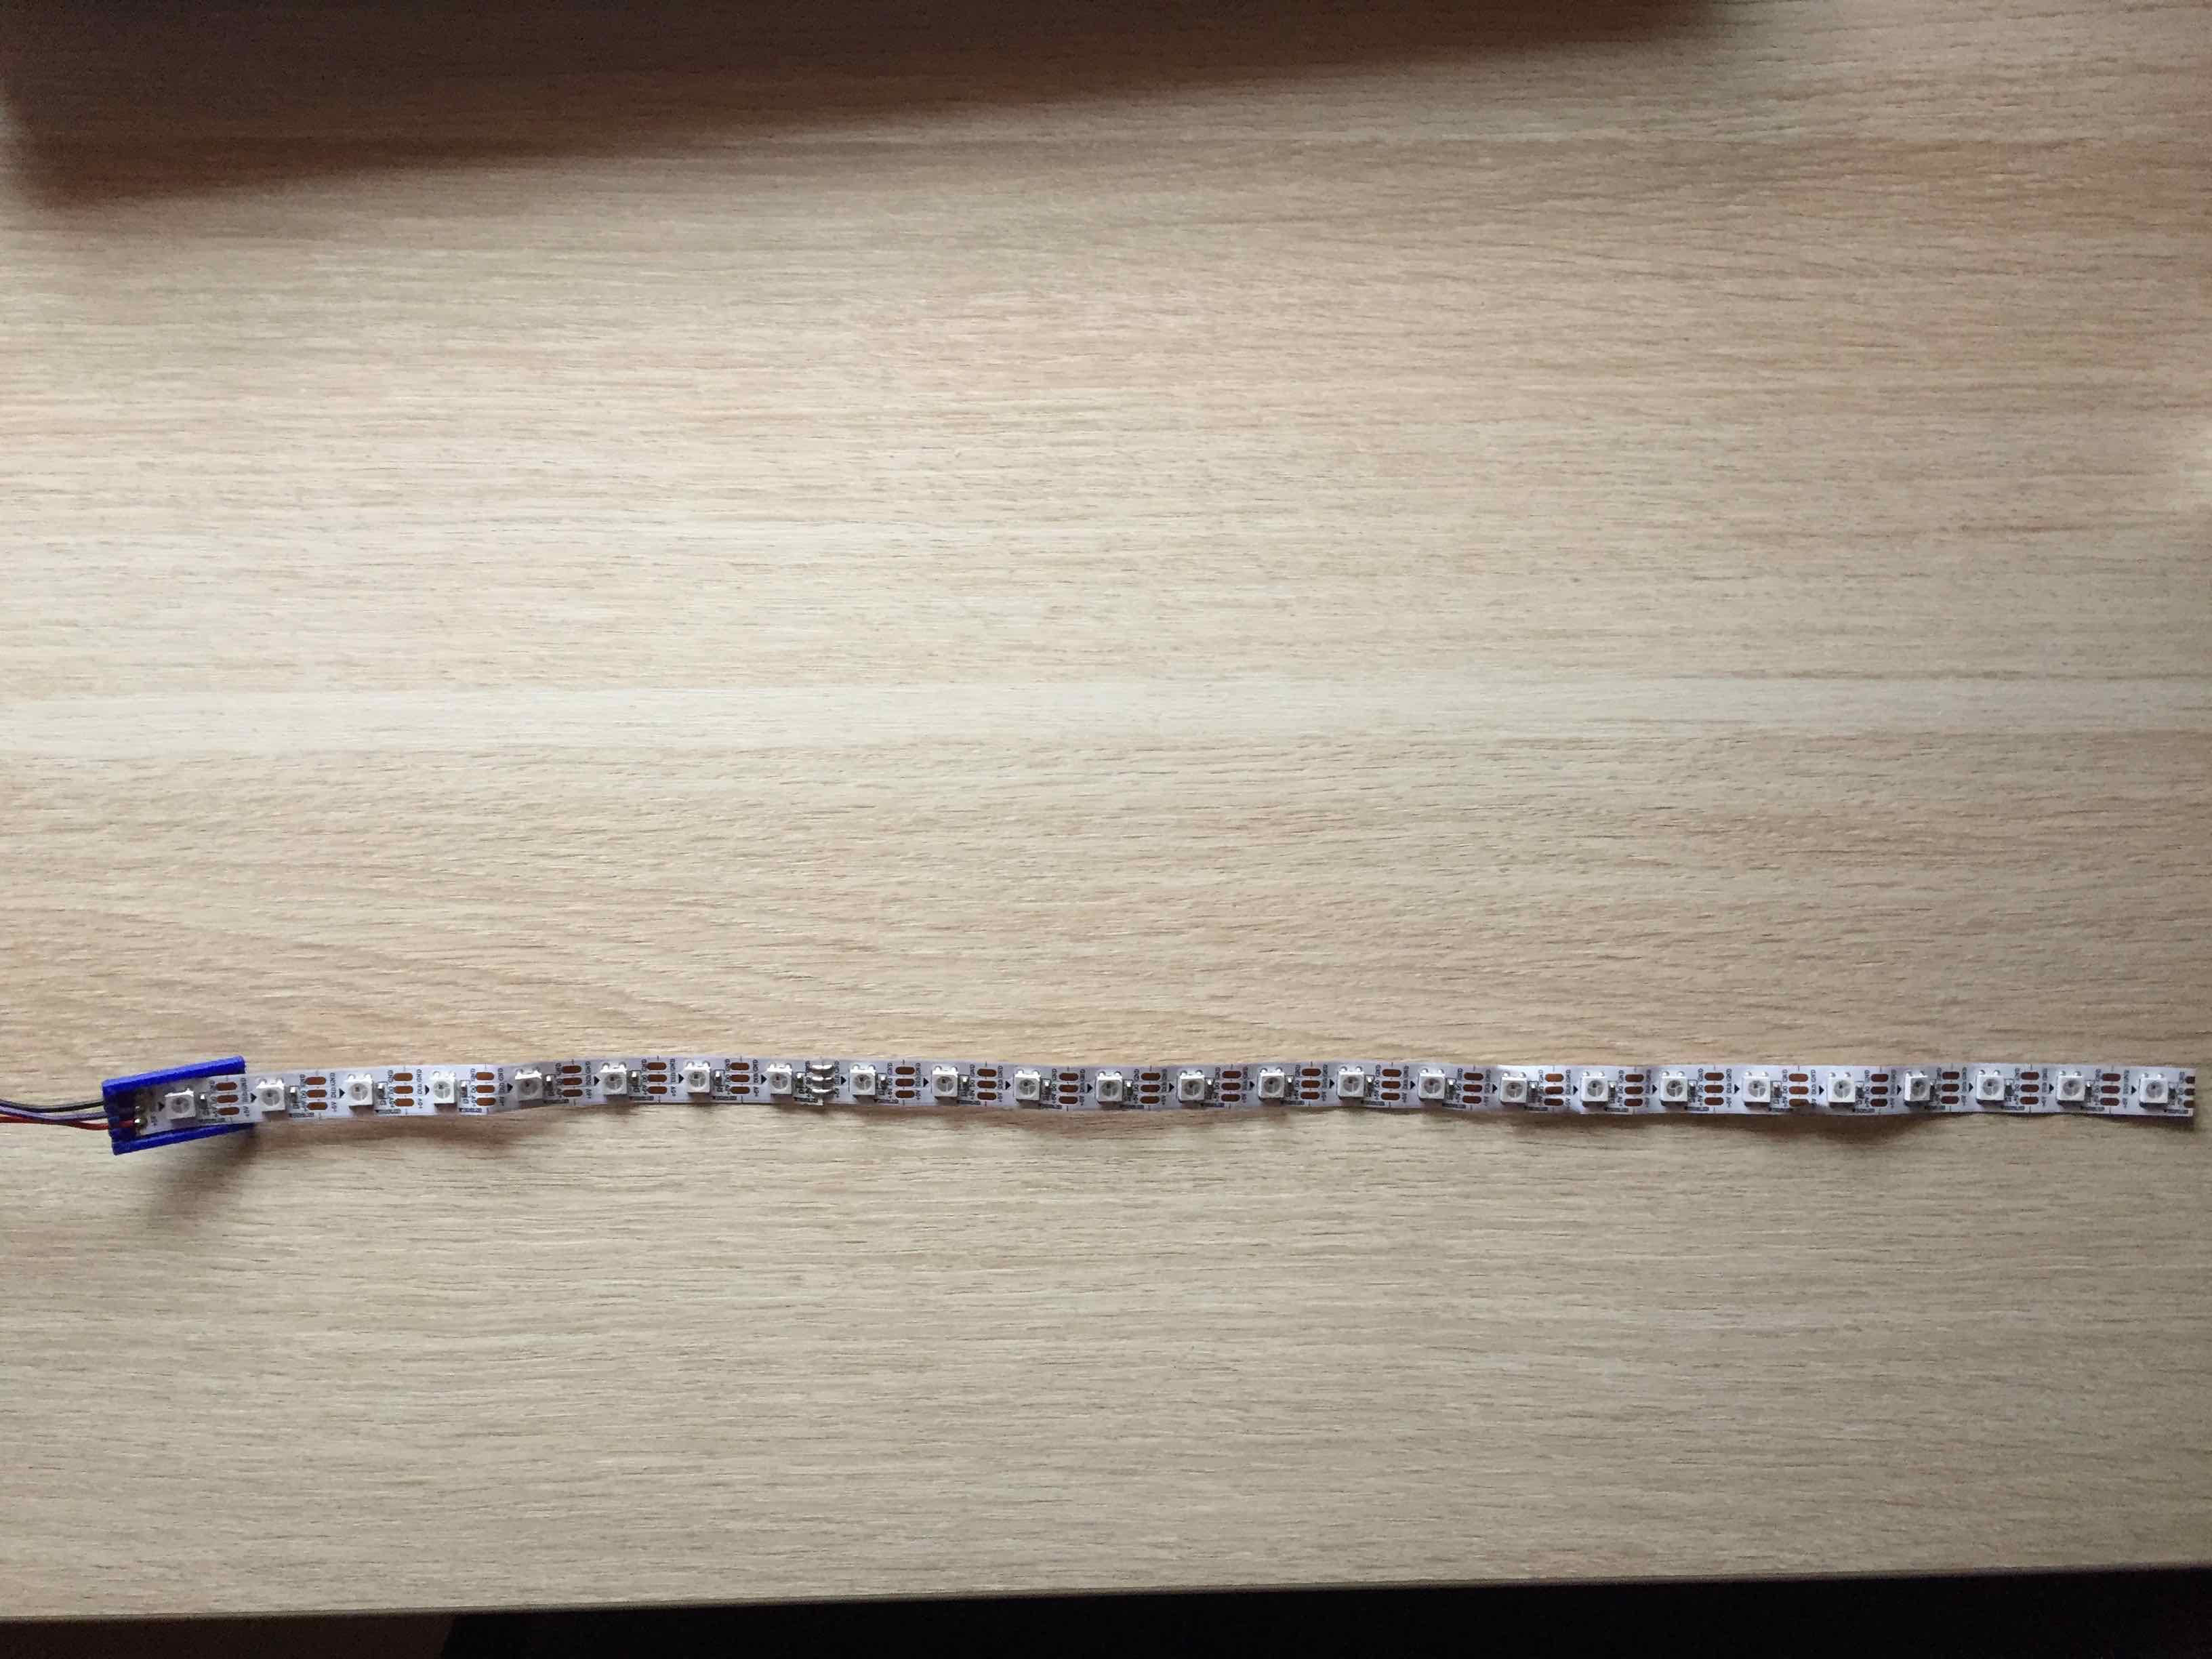
Der Ganze Strip mit 25 LEDs, der noch an der Bar angebracht werden muß
Ich habe als Grundlage für den Code das Beispiel aus der Arduino IDE verwendet und für meine Bedürfnisse angepasst.
Diese Zeilen müssen ggf. geändert werden.
// Which pin on the Arduino is connected to the NeoPixels?
// On a Trinket or Gemma we suggest changing this to 1:
#define LED_PIN 6
// How many NeoPixels are attached to the Arduino?
#define LED_COUNT 25
Der Code:
// Program for LED Strip
// For LED WS2812B Strip
// Modified from original Arduino strandtest
// © 22.01.2023 by Thomas Weidner
// tweidner@mac.com
// From original source code
// A basic everyday NeoPixel strip test program.
// NEOPIXEL BEST PRACTICES for most reliable operation:
// - Add 1000 uF CAPACITOR between NeoPixel strip's + and - connections.
// - MINIMIZE WIRING LENGTH between microcontroller board and first pixel.
// - NeoPixel strip's DATA-IN should pass through a 300-500 OHM RESISTOR.
// - AVOID connecting NeoPixels on a LIVE CIRCUIT. If you must, ALWAYS
// connect GROUND (-) first, then +, then data.
// - When using a 3.3V microcontroller with a 5V-powered NeoPixel strip,
// a LOGIC-LEVEL CONVERTER on the data line is STRONGLY RECOMMENDED.
// (Skipping these may work OK on your workbench but can fail in the field)
#include <Adafruit_NeoPixel.h>
#ifdef __AVR__
#include <avr/power.h> // Required for 16 MHz Adafruit Trinket
#endif
// Which pin on the Arduino is connected to the NeoPixels?
// On a Trinket or Gemma we suggest changing this to 1:
#define LED_PIN 6
// How many NeoPixels are attached to the Arduino?
#define LED_COUNT 25
// Declare our NeoPixel strip object:
Adafruit_NeoPixel strip(LED_COUNT, LED_PIN, NEO_GRB + NEO_KHZ800);
// Argument 1 = Number of pixels in NeoPixel strip
// Argument 2 = Arduino pin number (most are valid)
// Argument 3 = Pixel type flags, add together as needed:
// NEO_KHZ800 800 KHz bitstream (most NeoPixel products w/WS2812 LEDs)
// NEO_KHZ400 400 KHz (classic 'v1' (not v2) FLORA pixels, WS2811 drivers)
// NEO_GRB Pixels are wired for GRB bitstream (most NeoPixel products)
// NEO_RGB Pixels are wired for RGB bitstream (v1 FLORA pixels, not v2)
// NEO_RGBW Pixels are wired for RGBW bitstream (NeoPixel RGBW products)
// setup() function -- runs once at startup --------------------------------
void setup() {
// These lines are specifically to support the Adafruit Trinket 5V 16 MHz.
// Any other board, you can remove this part (but no harm leaving it):
#if defined(__AVR_ATtiny85__) && (F_CPU == 16000000)
clock_prescale_set(clock_div_1);
#endif
// END of Trinket-specific code.
strip.begin(); // INITIALIZE NeoPixel strip object (REQUIRED)
strip.show(); // Turn OFF all pixels ASAP
strip.setBrightness(100); // Set BRIGHTNESS to about 1/5 (max = 255)
}
// loop() function -- runs repeatedly as long as board is on ---------------
void loop() {
// Fill along the length of the strip in various colors...
colorWipe(strip.Color(255, 0, 0), 150); // Red Delay
colorWipe(strip.Color( 0, 255, 0), 150); // Green Delay
colorWipe(strip.Color( 0, 0, 255), 150); // Blue
colorWipe(strip.Color( 255, 255, 255), 150); // White
colorWipe(strip.Color( 255, 114, 86), 150); // Orange
rainbow(50); // Flowing rainbow cycle along the whole strip
}
// Some functions of our own for creating animated effects -----------------
// Fill strip pixels one after another with a color. Strip is NOT cleared
// first; anything there will be covered pixel by pixel. Pass in color
// (as a single 'packed' 32-bit value, which you can get by calling
// strip.Color(red, green, blue) as shown in the loop() function above),
// and a delay time (in milliseconds) between pixels.
void colorWipe(uint32_t color, int wait) {
for(int i=0; i<strip.numPixels(); i++) { // For each pixel in strip...
strip.setPixelColor(i, color); // Set pixel's color (in RAM)
strip.show(); // Update strip to match
delay(wait); // Pause for a moment
}
}
// Rainbow cycle along whole strip. Pass delay time (in ms) between frames.
void rainbow(int wait) {
// Hue of first pixel runs 5 complete loops through the color wheel.
// Color wheel has a range of 65536 but it's OK if we roll over, so
// just count from 0 to 5*65536. Adding 256 to firstPixelHue each time
// means we'll make 5*65536/256 = 1280 passes through this loop:
for(long firstPixelHue = 0; firstPixelHue < 5*65536; firstPixelHue += 256) {
// strip.rainbow() can take a single argument (first pixel hue) or
// optionally a few extras: number of rainbow repetitions (default 1),
// saturation and value (brightness) (both 0-255, similar to the
// ColorHSV() function, default 255), and a true/false flag for whether
// to apply gamma correction to provide 'truer' colors (default true).
strip.rainbow(firstPixelHue);
// Above line is equivalent to:
// strip.rainbow(firstPixelHue, 1, 255, 255, true);
strip.show(); // Update strip with new contents
delay(wait); // Pause for a moment
}
}
Wahnsinn
Januar 12, 2023 Lesezeit: ~1 Minute
Das ist ja der Hammer. Die bösen Russen, wagen die es doch auf einen Soldaten zu schießen. Pfui, lieber Putin also so was macht man in einem Krieg nun wirklich nicht. Schäm Dich.
Nur der Westen, bzw. die Ukraine darf schießen, das nennt man dann, aus westlicher Sicht, Verteidigung. Also Putin merk Dir das !
Jetzt aber ganz schnell zu Genesung nach Deutschland. Steini überreicht bestimmt eine Medallie.. Danach ganz schnell Einbürgerung, weil die Ukraine verteidigt doch die Freiheit in Europa.
Eine gute Nachricht
November 22, 2022 Lesezeit: ~1 Minute
Lange nicht mehr eine so gute Nachricht gelesen.
Das ist auch so ein Schrott, den die Welt nicht braucht.
Nancy Faeser will Vorratsdatenspeicherung wieder einführen
September 7, 2022 Lesezeit: ~1 Minute
Nicht schon wieder dieses Thema. Lass Dir mal was Neues einfallen.
Klar wenn der Staat nicht genug schnüffeln kann, muß als Begründung mal wieder das bekannte Thema herhalten.
Bin mal gespannt, wenn die Leute wegen der explodierenden Preise auf die Straße gehen, was Frau Faeser dann wohl sagt.
Die Rechten und die Linken untergraben die Demokratie, wir müssen jetzt verstärkt überwachen.
Nancy fahr zu dem Komiker nach Kiew und geh dort wieder Sekt saufen, dass kannst Du doch richtig gut.
Diese Regierung besteht doch nur noch aus Vollidioten, wer nimmt diese Spacken noch für voll ?
Danke Habeck
Juni 17, 2022 Lesezeit: ~1 Minute
Prima, erst fährt dieser Grüne Spinner die Energieversorgung vor die Wand, dann droht er mit gesetzlichen Verordnungen.
Und solchen Typen legen wir die Versorgung unseres Landes in die Hände, na wunderbar. Der Habeck muß auch nicht frieren und wenn die Preise für Energie weitersteigen erhöhen sich unsere Volksverräter die Diäten.
Ich bin jedenfalls nicht bereit, für dieses korrupte Regime in der Ukrainie zu frieren. Das ist nicht unser Krieg, ich glaube wir haben hier genug Probleme im eigenen Land. Herr Habeck, mal etwas für die Zukunft:
Man tritt seinen Lieferanten erst dann in den Arsch, wenn man eine Alternative hat.
Aber klar aus Katar die Energie zu beziehen ist eine tolle Idee, es ist dort eine Vorzeigedemokratie an der Regierung, genau wie in Saudi Arabien. Die Saudis bombardieren doch nur den Jemen, ach habe ich ganz vergessen. Das sind die Freunde der USA, also die Guten.
Small installation guide for postfix and dkim
Juni 9, 2022 Lesezeit: 6 Minuten
How to install smtp and dkim on linux Server
This description is only a very small installation guide.
For more information and explanation of the parameters read the postfix/dkim manual.
### Install postfix and mailutils ###
Login as root on the server:
apt-get install postfix
During the installation set the fqdn for the server
apt-get install mailutils (mail and mailx for cli)
Edit main.cf
vi /etc/postfix/main.cf
[...]
myhostname = example.com (check whether hostname / fqdn is correct)
sender_canonical_maps=hash:/etc/postfix/sender_canonical
mtp_tls_security_level = may
mynetworks = 127.0.0.0/8 172.18.0.0/16 [::ffff:127.0.0.0]/104 [::1]/128 (each client must be listed here to allow access to smtp, or if more than one client the subnet)
[...]
after dkim has been installed, put these entries at the end of main.cf
inet_protocols = ipv4
milter_default_action = accept
milter_protocol = 6
smtpd_milters = inet:localhost:8891
non_smtpd_milters = inet:localhost:8891
service postfix restart
Edit / create sender_canonical
vi /etc/postfix/sender_canonical
root root@example.com
postmap /etc/postfix/sender_canonical
Restart postfix service
service postfix restart
### Install DKIM ###
apt-get install opendkim opendkim-tools
Edit opendkim, all entries with SOCKET should be comment out, only RUNDIR should be comment in
vi /etc/default/opendkim
[...]
RUNDIR=/var/run/opendkim
[...]
Edit opendkim.conf
vi /etc/opendkim.conf
[...]
Syslog yes
UMask 002
Canonicalization relaxed/simple
Mode sv
SubDomains yes
SignatureAlgorithm rsa-sha256
OversignHeaders From
Socket inet:8891@localhost
PidFile /var/run/opendkim/opendkim.pid
OversignHeaders From
TrustAnchorFile /usr/share/dns/root.key
UserID opendkim
KeyTable /etc/opendkim/key.table
SigningTable refile:/etc/opendkim/signing.table
ExternalIgnoreList /etc/opendkim/trusted.hosts
InternalHosts /etc/opendkim/trusted.hosts
[...]
Change permission and create directory
chmod u=rw,go=r /etc/opendkim.conf
mkdir /etc/opendkim/keys
chown -R opendkim:opendkim /etc/opendkim
chmod go-rw /etc/opendkim/keys
Edit signing.table and key.table
vi /etc/opendkim/signing.table
*@example.com example
vi /etc/opendkim/key.table
example example.com:202207:/etc/opendkim/keys/example.com.private
(202207 is the selector, it is needed for dns entry later. You can name it, however you like.)
Edit trusted.hosts
vi /etc/opendkim/trusted.hosts
127.0.0.127
::1
example
example.com
Change permissions
chown -R opendkim:opendkim /etc/opendkim
chmod -R go-rwx /etc/opendkim/keys
Create Domain Key and rename it
cd /etc/opendkim/keys
opendkim-genkey -d example.com -b 2048 -r -s 202207
mv 202207.private example.private
mv 202207.txt example.txt
Change permissions and restart opendkim
chown -R opendkim:opendkim /etc/opendkim
chmod -R go-rw /etc/opendkim/keys
systemctl restart opendkim
systemctl status -l opendkim
The Content of example.txt must be inserted in DNS e.g.
cat /etc/opendkim/keys/example.txt
202207._domainkey IN TXT ( "v=DKIM1; h=sha256; k=rsa; s=email; "
"p=MIIBIjANBgkqhkiG9w0BAQEFAAOCAQ8AMIIBCgKCAQEAp/JLS3R5eetf9EHDd9tJzPwjK7yigXG4DRX/zlwqp01E9vrHNE3YGEmSdAy9vWPgzY4WDcWvuci+SllFZTIt+0MGCKfAJ2qnQK2S9BGKAUxMsLw2RPdg+95OaQKAdbXn9KLdmUsMv4kOIvhfrqx7oekFOi9J1uVo7z95lDmNugQ4yvYlWg+XFe33LCb1SKZboOw4b5rlZP59tk"
"eLZTL+rm8CLCFyM4xQOHO30B9X5iXMWx9sWSuCKrVGNXFuTSzO69F33pBzS6LQpG1IMn9jtKf4L18CUoXdW7t1hd2g9eQ1Hw7ab17/jIC19nm2fEkdBHRfmnSx23uQj8yfDAYDgQIDAQAB" ) ; ----- DKIM key 202207 for example.com
This is important for DNS:
v=DKIM1; h=sha256; k=rsa; s=email; "
"p=MIIBIjANBgkqhkiG9w0BAQEFAAOCAQ8AMIIBCgKCAQEAp/JLS3R5eetf9EHDd9tJzPwjK7yigXG4DRX/zlwqp01E9vrHNE3YGEmSdAy9vWPgzY4WDcWvuci+SllFZTIt+0MGCKfAJ2qnQK2S9BGKAUxMsLw2RPdg+95OaQKAdbXn9KLdmUsMv4kOIvhfrqx7oekFOi9J1uVo7z95lDmNugQ4yvYlWg+XFe33LCb1SKZboOw4b5rlZP59tk"
"eLZTL+rm8CLCFyM4xQOHO30B9X5iXMWx9sWSuCKrVGNXFuTSzO69F33pBzS6LQpG1IMn9jtKf4L18CUoXdW7t1hd2g9eQ1Hw7ab17/jIC19nm2fEkdBHRfmnSx23uQj8yfDAYDgQIDAQAB
Selector is 202207
To check the key, wait 24h
opendkim-testkey -d example.com -s 202207 -vvv
opendkim-testkey: using default configfile /etc/opendkim.conf
opendkim-testkey: checking key '202207._domainkey.example.com'
opendkim-testkey: key not secure ==> it is ok, no DNSSEC in use
opendkim-testkey: key OK